I knew as soon as I saw
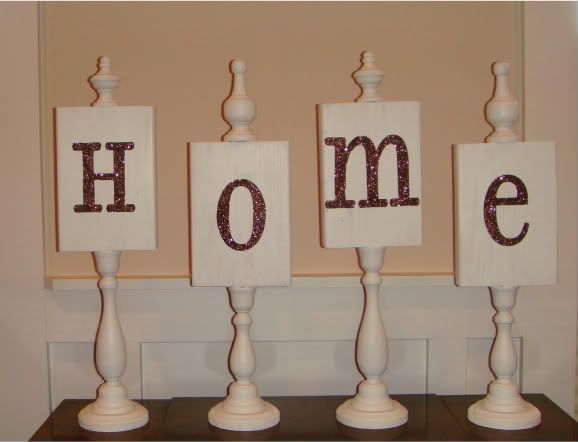
this blog post with a wonderful tutorial from Whitney, that I HAD to make these cool plaques!
I changed mine up a bit, I changed the color to Totten's Inlet (Valspar). Instead of burlap I decided I wanted to be able to change mine up for the seasons or whatever, so I used my
Cricut machine to cut out the HOME letters. You can cut them out of vinyl but I used white contact paper. If you don't have a die cut machine you can find precut vinyl in many craft stores already cut out and your local scrapbook store probably has machines available to use for a small fee. I then
airbrushed the white contact paper with
E44 Clay and then used a thick coat of Mod Podge Matte as the glue and sprinkled Makeing Memories Brown glitter over the top. I let them dry for about an hour before I peeled the backing off and placed them on the wood.
Then because the backs were painted and looked bare I decided I wanted to be able to use them too so I was searching
Martha's website and came across
this and that was it! Here is how that turned out.
Isn't that too cool! I made the chalkboard paint the same color as the plaques and used colored chalk for the letters. I can even make
my own color of chalk to use on this too! ( I haven't done that yet) My biggest issue with this is that I went in thinking that I could draw or hand write on this side but I did not like my drawings or handwriting so... I used my handy dandy Cricut again and cut out the letters LOVE and then used the reverse of the cut outs as a mask for the letters. I like how it turned out.
I would love to hear from you so please let me know what you think!
Linked up with:


