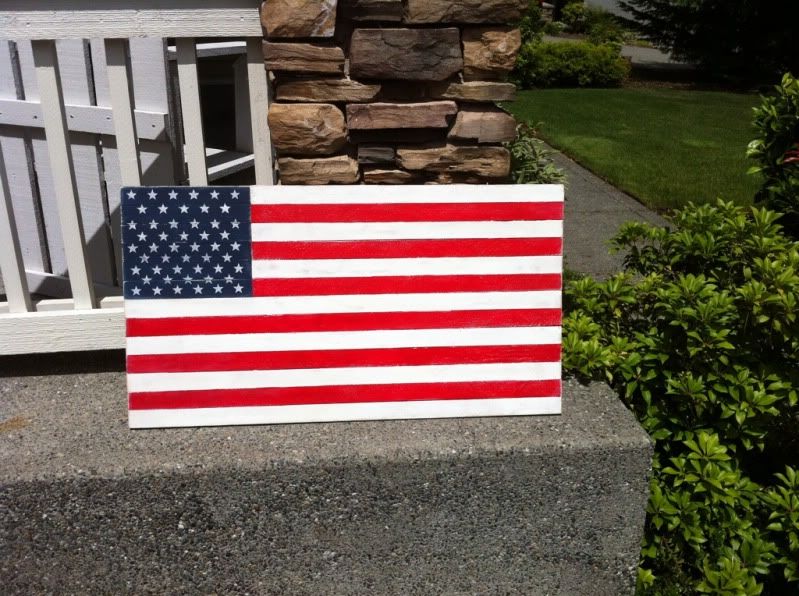
Pages

Showing posts with label DIY. Show all posts

Wednesday, October 9, 2013

31 Days of Creativity Day 10

I have linked up at the Nester to join in on the 31 Days Challenge!

Day 10 DIY Embossing Folder

I have been seeing this cool snowy background on several Christmas cards this year and I love it!  Unfortunately the folder has been discontinued and I couldn't find a used one for sale anywhere.  So what to do?  I made my own!


I cut a 5x7 piece out of a cereal box to make the top part of the folder and then pressed it into a piece of card stock which is used for the bottom part of the folder.  I used drops of Ranger's Glossy Accents to make the "dots" because it dries very hard.  I think it turned out great!!

The top of the picture shows the folder and the bottom shows what embossed card stock looks like.  I am so happy!  I will be making a card soon and post it on here.  :)


Thanks for stopping by!
 
To see my other 31 Days Challenges for this year:


Thursday, October 3, 2013

31 Days of Creativity Day 4

I have linked up at the Nester to join in on the 31 Days Challenge!

Day 4

I bought some misc fall picks and wired them together and then on to the pumpkin frame.  I then attempted to make a bow...  The bow okay, not great but okay.  We recently had a wind storm and I just tell people they should have seen it before the wind hit it, it was beautiful!  :)

Have you made anything for fall this year?  I would love to see it!

Thanks for stopping by!
  To see my other 31 Days Challenges for this year:


Wednesday, May 1, 2013

Happy May Day!


I don't remember when it started but for as long as I can remember I have given my mom flowers on May Day.  This year will be no different.  I started making these flowers a last month but never finished them. (Can you tell I am a procrastinator? Nah.)  This all started while I was browsing Pinterest and seeing tons of beautiful paper flowers and was amazed that they were being made from coffee filters.  So I found a tutorial I liked and started making them. Then stopped. Then started again. Then stopped... You get the picture. I did finally get them done! 

I think theses are so pretty gathered together!  There are five flowers here.
I stamped a tag and tied it to the bouquet.
I thought I would give her a little something that she can carry with her wherever she goes, to know that she is loved!


The heart is a pocket token from Lisa Leonard Designs.  This is my third order in a little over a month!  All of her items are handcrafted and simply stunning!

Thank you for stopping by and wishing you a wonderful May Day!


Thursday, December 13, 2012

So I tried another craft I saw on Pinterest...

I have been on Pinterest for almost two years now and I still love it as much as I did in the beginning!  The problem with it is I find so many things I want to try, but I just don't have the time to try them all...

I did find the time to try this one and guess what?  It worked!  YAY!


I used different sizes and brands of glitter and they all turned out great!  They look good on the tree too!

Thanks for stopping by!

Monday, November 14, 2011

Dena's Birthday Bracelet


Other than a ring this is the first jewelry that I have completed!  It was a kit but I think I did well for not having done it before.  Three of the flowers have magnets that are holding lavender swarovski crystals.  It is very pretty.


Dena really likes it!


Saturday, July 30, 2011

Picture Frame Hanging Tip

Picture Frame Hanging Tip

I came across this while blog surfing today! I am so going to use it for this project.  Of course that means that I have to actually do something.  Ever since I cleaned straightened up the craft room, I haven't done a thing but blog surf.  I see lots of cool things while surfing Pintrest and the blogs but I just don't seem to have the oomph to do anything...  Oh well, as Scarlet O'Hara said, tomorrow is another day.

Monday, July 11, 2011

More 4th Decor!

Okay, I think this will be the last 4th of July themed post!  Well, at least until the next one.  :)  This is actually the project that got me started the whole 4th crafty spurt this month.


I have two sets left that I haven't painted yet and I think I am going to make them for Christmas.

Thanks for stopping by!


Please check out the link above to see where I Party!

Last minute 4th decor!

After my 
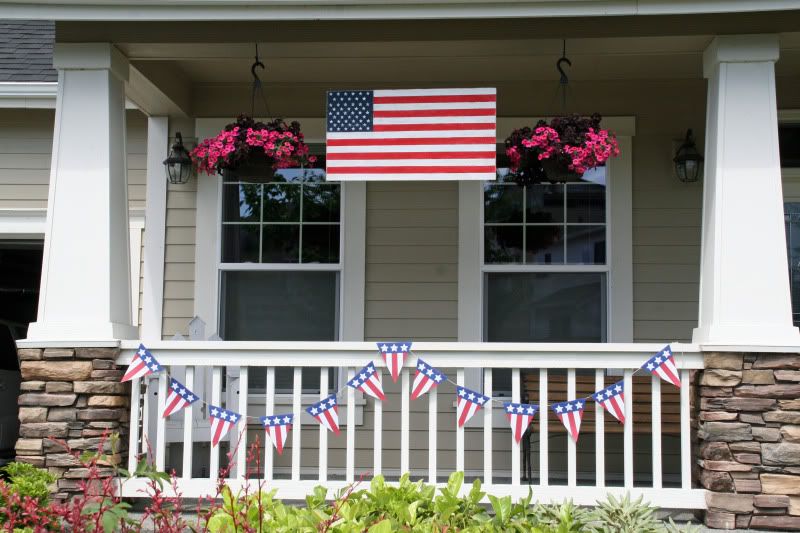
flag was hanging up, I decided it looked a little blah, so I went shopping the day before the forth, looking for some flag bunting.  I think I have been married to a tightwad  frugal man for too long because everything seems to be more and more expensive to me!  I just couldn't see spending 18.00 at the hardware store for ONE bunting!  Even at Wally world it was 25.00 for three.  I can usually make something cool (less expensive) so I searched the internet and found this great flag bunting downloadLovely and Gracious is the name of the blog, I just love the name.  It is something I hope to always be Gracious and Loving to everyone.  After printing the flag download (thirteen times!), I cut them all out and after dithering on how to hang them (on a string to swag them or just straight across the railing) this is how it turned out:


I really like it!  I would have liked to have left it up longer but I had to take the bunting down early the next morning because frugal man was going to water the baskets and I didn't want them ruined.  They are safe and sound in the Summer rubbermaid container waiting for next year.  Maybe I will get them out again for Veterans day!  Oh and for Memorial Day! Ohh and maybe Flag day!  Hmm, maybe I will laminate them too!

Thinking, thinking, thinking...


Check out the link above to see where Party!

Tuesday, July 5, 2011

Homemade flag for the 4th!

I knew as soon as I saw this post, I was going to have to make one for myself!

This is my version:
 

The directions on the blog are very easy to follow.  Hubby (thank you honey) did all the cutting and gluing, I just painted it.  The hardest part for me was adding the stars!  I didn't have a stamp that would fit so I made a stencil to get them all the same size. 

I really like how it turned out and I  think it will stay up for awhile.


P.S.  This post has been featured on Kindra's blog At Home with K, please check it out and leave her some love.  Thanks Kindra!


I have linked up to these wonderful sites:
UndertheTableandDreaming


A Marvelous Mess


Tip Junkie handmade projects


Today's Creative Blog
lil luna link party button


SYS Thurs


Party Button


Bubbly Nature
Iron Violet Designs
monogramJoin  us Saturdays at tatertotsandjello.com for the weekend wrap up
    party!